To create powerfull reports in MassTrack, you can use the Crystal Reports Viewer. Below we will explain how to use it for the first time and what to do when using it later on.
First Time You Run A Report
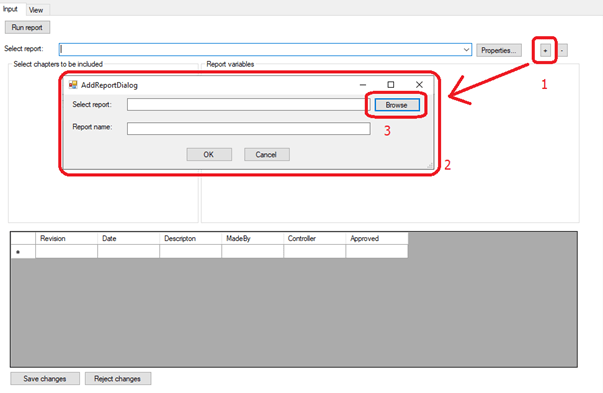
After you have opened the Crystal Report MassTrack Viewer (menu: Project->Crystal Reports…), click the [+] button (1) to get to the Select Report Window (2), where you can hit the Browse button (3) and select the Crystal Reports Template file (*.rpt).
Next, give the report a name (optional) and click OK.
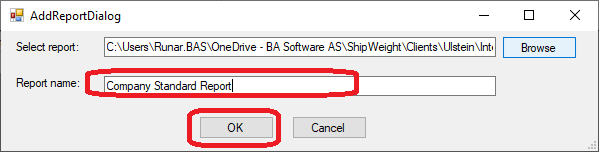
The name you enter for the report will now be the name shown in the droplist to select this report in future.
Selecting a report for the second time (and onwards…)
After a report have been added by selecting the *.rpt file, you can from now on find it and select it from the report droplist:

Remove a report from the list
If you want to remove the report from the list, select it in the droplist and click the [-] button.

Setting report parameters and run the report
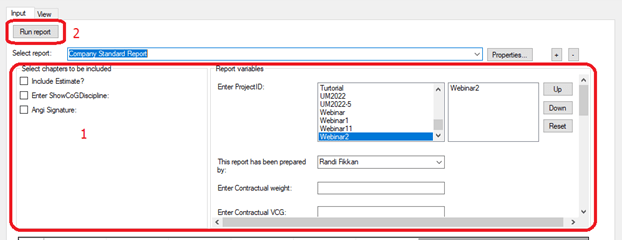
Fill in the report variables (1), which are custom for each report, and click the Run button (2)
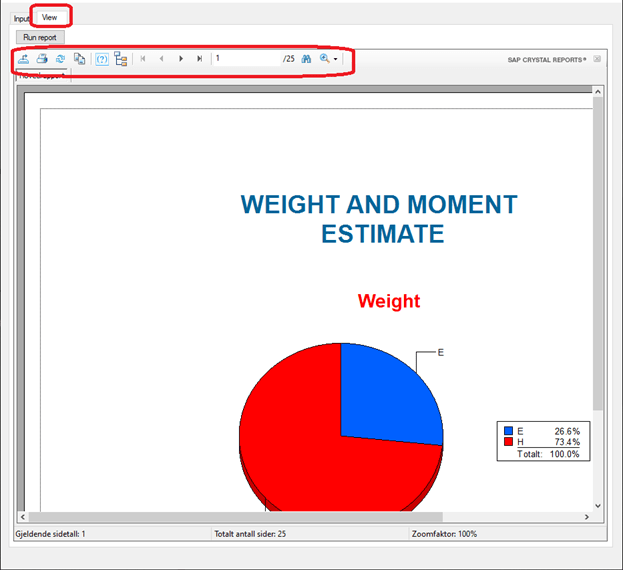
After the Run button is clicked, the report will start running and appear in the View area of the window, where you will find the toolbar with functionality to print, export, zoom, page, etc. :
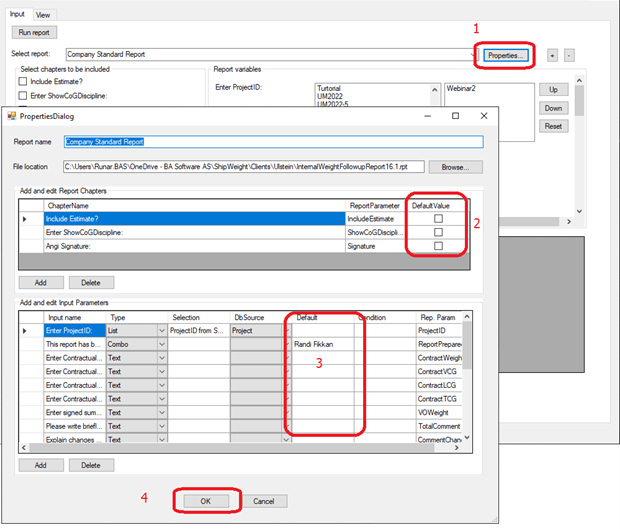
Setting default input variables for a report
To define default variables for the report (which then will be fill in every time you select the report), click the Properties button (1) and in the Properties Window, fill in default values in the area (2) and (3) and click OK (4).
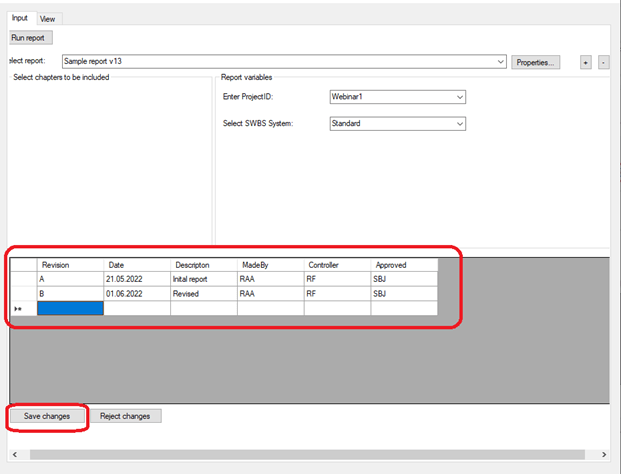
Revision Area (optional)
In addition to the options above you may store revision information in a table connected to the report and a project. This information may also be retrieved and used in the report itself (requires this to be set up in the template file).